Oscillating tools are versatile power tools that can be used for a variety of tasks, including cutting tiles.
Before using an oscillating tool to cut tile, it is important to properly prepare the area and choose the correct blade for the job.
In addition, proper safety precautions, such as wearing eye and ear protection, should be taken to avoid injury. With the right tools, knowledge, and care, cutting tiles with an oscillating tool can be a quick and easy task.
Many homeowners have a hard time cutting thin pieces of tile or ceramic without using power tools, which can get expensive. They may also need a tool that is capable of very fine precision cuts, such as in a bathroom or kitchen where it’s difficult to place the material away from the source of water.
Oscillatory-blade cutters are your best bet if you are looking to avoid having to invest in more powerful manual blades. There are many different brands that offer different models, but they all work in the same way.
This article will go over how to use an oscillation blade cutter to create perfect tiles and squares every time! Read on for detailed information.
What Is An Oscillator Blade Cutter?
An oscillator blade cutter is a handheld device with a rotating blade that acts like a cookie cutter. The blade spins quickly creating a wave effect as it slices through the material. This allows you to create really thin layers of material, almost like slicing bread!
Most people who learn how to use one begin by trying to slice through thicker materials such as softwood or plastic.
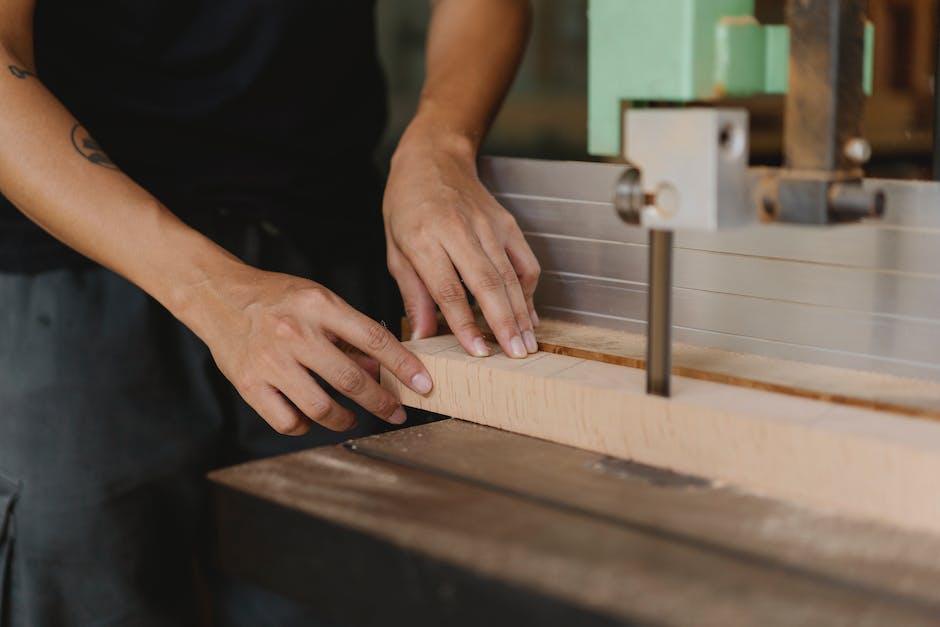
How To Cut Tile Oscillating Tool -Step-by-Step Guide

Gather your tools: You’ll need a tile-cutting blade, a measuring tape, a pencil, safety glasses, and hearing protection.
Measure and mark the tile: Measure the area of the tile that you need to cut and mark it with a pencil.
Secure the tile: Place the tile on a stable surface, such as a work table, and secure it in place with clamps.
Install the tile-cutting blade: Attach the tile-cutting blade to your oscillating tool.
Adjust the depth of the blade: Adjust the depth of the blade so that it does not go too deep into the tile, which can cause cracking.
Cut the tile: Turn on your oscillating tool and align the blade with the marked line on the tile. Slowly move the tool along the marked line, allowing the blade to do the work.
Clean up the edges: Use a tile file or a diamond grit blade to smooth out the edges of the cut tile.
Turn off the tool and unplug it.
Clean the tile: Wipe the tile down to remove any debris or dust.
Repeat the process if necessary: Repeat the process until all of your cuts are complete.
Check tool-chain
Many times, people will purchase a new cutter set or blade kit for their oscillator tool and it is very difficult to use due to poor quality of materials or lack of installation instructions.
Older model oscillators used plastic gear sets that needed to be pressed into the workpiece surface. These gears would sometimes break off requiring you to buy a whole new tool!
More modern tools have metal gearing which does not need press-fitting but can cause trouble if not installed properly. The blades may also get stuck in the back when removing the tool from the cut.
Both types of cutting equipment require proper maintenance to run effectively. To ensure their longevity, make sure to take care of them by using appropriate cleaning products, lubricants, and settings.
Also, know how to use your tool so it will perform its function efficiently. If someone has to take over operating the tool, they might not be as skilled thus reducing effectiveness and wasting money.
Make sure your blade is sharp
Even though this tool was designed to cut hard materials, like ceramic or marble tiles, you should still keep your blades very sharp. If you have no idea how to sharpen one, there are many online resources that can help you do so!
You will need to use either diamond or emery paper to do it. Simply drag the paper across the edge of the blade, then rinse off the paper and see if its shape has changed. The lighter the color stone powder becomes, the sharper the knife is!
Once you have it pretty sharp, store the blade away and wipe down any excess moisture to prevent rusting.
Test your torque
Torque is the push or pull that happens when you turn a screw or tool. You can feel this torque in your hand as something familiar, like when you put new screws into a board and have to apply some pressure to get them started.
When using power tools, it is important to know how much torque you are applying to the blade, bit, or shaft of the tool. Too high of a level can cause damage to the motor or breakage of the equipment!
It is very easy to tell if your tool has lost its grip due to low levels of torque, but higher levels may not be known until later. By testing your tool once or twice, we can learn how to cut tile oscillator tips here.
We will go over some basic tools and then test our cutter blades to see what kind of torque they hold before trying to use them in a project. If you ever experience trouble while working with these tools, do not force them.
Replace worn or damaged parts

The majority of people don’t realize that tile cutters can easily break down with time! This is very important to keep in mind as you use your tool. If your blade gets dull, it will no longer effectively cut tiles, and you will have to replace it!
Parts of a tile-cutting oscillator tool can wear out. Unfortunately, these are not typically durable materials that can be replaced readily without professional help.
The motor usually does not work when this happens, so unless you are mechanically inclined, you will need to get a new one. Make sure to buy from a reputable seller before buying online.
Practice on small tiles before tackling a large one

Professional tile grout artists almost exclusively use one tool. This is typically a knife or sander paired up with a power source, such as an oscillator. An oscillator works by vibrating a thin blade in a circular motion at very high speeds.
Sanding can be adjusted depending on how much you want to do. The faster you move the blade through space, the more sand it will scrape off of your tiled surface! A good tip when using an oscillator is to drag the blade slowly across all six edges of a square tile first to ensure even coverage.
After every few passes, you can rotate the tile so that another edge meets the blade. Keep doing this until all sides are adequately covered and you have a nice-looking tile. To make sure everything lines up properly, lay the tile on a plastic sheet and check for any gaps or overhangs.
Utilize the Oscillating Tool as a Tile File
An oscillating tool can also be used as a tile file. This means that it can be used to smooth out the edges of the cut tile.
This is especially useful for making small adjustments or fine-tuning the cut line, after cutting the tile. The tile file attachment for an oscillating tool is typically a diamond grit blade that is specifically designed for this purpose.
This will smooth out any rough edges and give the tile a more finished look. It’s important to keep in mind that you should use a light touch and work slowly to avoid chipping or damaging the tile.
In addition, always wear safety gear and make sure that the tool is unplugged before installing or changing the blade attachment.
Know the difference between dry and wet glue

Glue is a very important tool for tiling projects! There are two main types of glues that you will need to use in your tile setting projects: water-based and powder-based.
Dry glue, also known as thin-set mortar, is a dry powder that is mixed with water to create a paste that is used to bond tiles to a surface. This type of glue is typically used for ceramic and porcelain tile installation on surfaces such as concrete, cement board, and backer board.
Wet glue, also known as mastic, is a pre-mixed, wet adhesive that is spread onto the surface before the tile is placed.
This type of glue is generally used for smaller projects, such as backsplashes and wall tiles, and is typically used with ceramic and natural stone tiles.
Wet glue is easy to work with, but it doesn’t have the same strength and durability as dry glue. Additionally, it is not recommended for use in high-moisture areas, as it can lose its bond over time.
Both types of glue have their own advantages and disadvantages, and the choice of glue depends on the tile type, the surface to be tiled, and the location of the installation.
FAQ’s
Will oscillating blade cut tile?
Yes, an oscillating tool equipped with a tile-cutting blade can be used to cut tile. It uses a back-and-forth oscillating motion to make quick and precise cuts. It’s always recommended to use a specialized tile cutter for a clean and precise cut.
How do you cut tile on a wall with an oscillating tool?
To cut tile on a wall with an oscillating tool, attach a tile-cutting blade, mark the area to be cut, secure the tile on a stable surface, adjust the depth of the blade, and carefully cut along the marked line while pressing lightly on the tool.
What blade is best for cutting tile?
The best blade for cutting tile is a diamond-grit blade specifically designed for cutting tile.
What kind of blade do you use to cut tile?
A blade to use when cutting tile is a diamond-grit blade specifically designed for cutting tile. These blades are known for their durability and ability to make precise cuts on different types of tiles without chipping or cracking them. It is also important to ensure that the blade is compatible with your cutting tool and that it’s sharp.
Conclusion:
I hope, In this article, You would have cleared info about how to cut tile oscillating tool can be a quick and easy task when done correctly. Proper preparation, the correct blade, and proper safety precautions are essential for a successful and safe tile-cutting experience. With the right tools and knowledge, you can achieve precise cuts on any tile surface.
Thanks for the reading.